Posted by Wouter Akika
on February 26, 2024
How do you use MicroSculpt? Discover the Joy of Lifted, Youthful Skin with Our At-Home MicroCurrent Guide!
We've all been there – that moment of excitement when you unbox your new skincare gadget… followed by the creeping sense of confusion and frustration over how to use it. Fret not! To guide you along the way, in this article we’ll detail five simple steps to seamlessly integrate MicroSculpt into your skincare routine:
So say goodbye to perplexity and hello to firmer skin that highlights your best feature. Get ready to unravel the secrets of mastering MicroSculpt for a visibly fresh, contoured appearance!
| MicroSculpt’s 5-Step 5-Minute Routine |
|
Let’s Get A More In-depth Look To Get The BEST Results
It’s important to explore each step in greater detail to ensure you’re well-equipped to achieve the best results possible.
From preparation to application, read along, and we’ll guide you through the nuances of utilizing MicroSculpt for a truly transformative skincare experience.
STEP 1: How to Properly Cleanse Your Skin Before Using My Derma Dream’s Microsculpt
Preparing your skin is vital when using MicroSculpt or any microcurrent device. Starting with thoroughly cleansed skin ensures your microsculpt device properly contacts the skin and maximizes the efficacy of the treatment for the following reasons:
-
Better Conductivity: Clean skin enhances the conductivity of electrical currents, preventing any barriers like oils and makeup from diminishing the device's effectiveness.
-
Enhanced Absorption: Cleanse-prepped skin fosters better absorption of conductive gels or serums, amplifying the effectiveness of the microcurrent treatment.
-
Removal of Oil and Dirt Barrier: Cleansing eliminates natural oils and impurities, ensuring that the microcurrent penetrates effectively for maximized treatment efficacy.
Here’s how to achieve the perfect cleanse:
-
Use a Gentle Water Based Cleanser: Choose a sulfate-free water based cleanser to effectively remove makeup, sunscreen, and daily grime without compromising your skin's natural oils.
- Lukewarm Water is Your Friend: It helps in effective cleansing while maintaining your skin’s moisture balance.
-
Pat dry with a soft cloth: Use a non-abrasive cloth and pat your face dry gently to avoid irritation.
Quick Tips to Avoid Mishaps:
-
Avoid Alcohol based cleansers: Skip products with high alcohol content to prevent skin dryness and irritation.
- Gentle Exfoliation: Avoid aggressive scrubs that might lead to skin sensitivity.
- Double Cleanse with Care: If using oil-based cleansers, follow up with a water-based one to remove any residue.
By following these cleansing tips, you’re setting the stage for an optimal MicroSculpt experience, paving the way for the toned, glowing skin you’ve been working towards!
STEP 2: How to Correctly Apply Your Activator Serum
Once you’ve achieved a pristine canvas with cleansing, the next step is applying the activator serum.
Applying an activator serum before using a microsculpt device is crucial as you CANNOT use microcurrent without a conductive activator serum or gel for the following reasons:
- Comfort and Hydration: Activator serums hydrate the skin and can diffuse intense sensations or discomfort from microcurrent devices, transforming the entire process into a more enjoyable and luxurious experience.
- Conductivity: Activator serums enhance conductivity during microcurrent treatments by improving the flow of electrical currents through the skin, ensuring optimal and effective results.
How To apply Activator Serum Or Aloe:
-
Focus On One Area At A Time: Apply a generous but not excessive amount to the area you’re focusing on. Your skin should look well-coated with a slight shine but not overly wet. Aim for an even layer allowing smooth device gliding.
-
Apply Your Activator Serum Evenly: Focus on one area at a time and gently pat the serum into the skin for better absorption.
-
Using Aloe: Many people choose to use organic aloe vera gel to hydrate their skin and activate the microcurrent of microsculpt. If you decide to use aloe & you need to ULTA-Hydrate your skin, apply a layer of the gel to your face and let it sit for around 10 minutes. Then, wipe the aloe off, apply another layer of aloe to your skin, and begin sculpting!
Why Aloe? The Reasons Why Aloe is Microsculpt’s Best Friend
Aloe vera is renowned in the skincare world for its ability to hydrate and repair skin; however, it has particular properties that make it a particularly exceptional activator serum. Here's why Aloe Vera Gel stands out as an ideal activator serum:
- Enhanced Microcurrent Distribution: Aloe vera gel excels at spreading the microcurrent evenly across a broader skin surface. This maximizes the efficacy of your Microsculpt sessions and ensures even results.
- Optimal Hydration: Aloe Vera Gel is a hydration powerhouse. Its moisture-rich formula not only nourishes your skin but also improves the conduction of microcurrents to the underlying muscles. This added hydration ensures that your Microsculpt experience is both effective and comfortable. The hydration aloe provides also contributes to collagen production which keeps skin looking youthful.
- Increased Comfort: Aloe vera significantly increases the conductivity of microcurrent across the skin’s surface, and in doing so, aloe can also lessen the intensity you feel from your microsculpt device. This can decrease any stinging or painful sensations that might arise, making each session more enjoyable.
How To Ultra-Mask With Aloe Vera for Increased Conduction & More Comfortable Experience
For some individuals, it’s best to ultra-mask, or apply an ultra-hydrating face mask, before trying microcurrent for the first time. Oftentimes, those with very oily or dry skin have a hard time feeling microcurrent. Either their skin is overly sensitive or they don’t feel it at all. Thus, we want to get very deep hydration into the skin so that microcurrent can penetrate deep past the skin past the layer of collagen and elastin and into the muscles.
One of the easiest ways to do this is to hydrate using aloe vera as an ultra-mask. Here’s how:
- STEP 1: After cleansing the skin, apply a thick layer of organic aloe vera gel and allow it to sit for ten minutes.
- STEP 2: Wipe the aloe off your face and apply another thick layer of aloe gel, and again let this sit for ten minutes.
- STEP 3: Next, apply aloe to the areas you will be microsculpting, and begin using your microsculpt device.
By making sure your skin is ultra-hydrated before using microsculpt, you can avoid discomfort and optimize your microsculpt experience to be more relaxing, and ultimately, more successful!
STEP 3: How to Turn On Your Microsculpt
Turning on your Microsculpt device is as simple as the quick press of a button - literally! To turn the device on, simply press in on the button without holding it down. Almost instantly, you should hear a light musical tone and see a blue light illuminate the first intensity level. This means the device is on! You can adjust your intensity levels by quickly pressing the power button. To turn the device off, press and hold the power button until your hear a musical tone and see the blue light on the display disappear.
What To Do If You Don’t Feel the Microcurrent
At the lowest setting, the microsculpt may not feel like anything against your skin, or at most it may feel like a light energetic vibration. This is completely normal. Microsculpt mimics the microcurrent already in your body, so on the lowest setting you may not experience any physical sensations from the device. If you find yourself increasing the intensity of the device but still not feeling the microcurrents, try these tricks for a more energetic experience:
-
Cleanse properly: Be sure the cleanser you use before microsculpting is water-based, and that your face is free of dirt, makeup, and oils.
-
Check your hydration: Dry skin can make it challenging to feel microcurrent because it lacks the hydration that allows for the smooth flow of electrical currents across the skin. If you are struggling to feel microcurrent, your skin may be dehydrated and could benefit from an aloe vera ultra-mask or an increased amount of activator serum.
-
Add in electrolytes: Adding more electrolytes into your activator serum will increase conduction even more and can help increase the feeling of the microcurrents as well. We recommend adding organic sugar and pink himalayan salt in with aloe vera gel for the best results. While both ingredients are rich in electrolytes, organic sugar helps to lock in skin’s moisture, while himalayan salt is known to help detoxify and help balance skin’s pH.
How to Address Any Discomfort From Using Microsculpt
If you experience any pain or discomfort while using Microsculpt, this is a sign to stop and address any underlying problems that might be affecting your microsculpt experience. Some of the most common reasons microsculpt may feel painful or too intense include:
- High Intensity: Selecting an intensity that exceeds your skin's tolerance can result in stinging or discomfort.
- Sensitive Skin: Some users are more prone to discomfort, and may require more activator serum for comfortable microsculpting sessions.
- Insufficient Gel: Not using enough activator serum can cause uneven current distribution, which may feel irritating to the skin.
- Dehydrated Skin: Dry skin is more susceptible to discomfort while using microsculpt.
If any of these issues prevent you from enjoying your microsculpt experience, we recommend these tips to reverse any discomfort:
-
Hydrate before using microsculting: Hydrated skin is crucial for comfort while using microsculpt. Make sure your skin is happy and moisturized before beginning your Microsculpt sessions.
-
Use aloe gel: Aloe gel helps to distribute microcurrent across the skin, and this can in turn help reduce the feeling of intense microcurrent as well.
-
Start with the lowest intensity: Begin with the lowest Microsculpt intensity, and if you experience discomfort, scale back to a lower setting.
-
Apply activator serum as you go: Activator serum can slowly absorb into the skin, so throughout your microsculpting session, it can be helpful to reapply a layer of serum to the target areas you are working on.
Follow these steps, and any bumps in the road can be quickly swept away, allowing you to focus on enjoying more sculpted skin!
STEP 4: Selecting the Right Microcurrent Intensity for Your Skin
Not only is every individual different… but also every part of the face is different. Given this, it’s important to select the right intensity level on your microcurrent device so your Microsculpt session is tailored to your specific needs. For example, the forehead has less padding than cheeks… which is why cheeks may be comfortable with a level 5 intensity setting, while the forehead may only feel good on a 2 or 3. Follow these tips to select the most comfortable intensity levels for your skin needs:
- Beginners or those with sensitive skin: it's wise to start low and gradually escalate the intensity, paying attention to your skin's response and adjusting accordingly for different facial areas.
- When to adjust down down: Mild tingling is normal, but any discomfort signals a need for adjustment. Now, if you’re on the level 1 and it’s still uncomfortable, this is because you likely don’t have enough hydration. See the section on Masking with Aloe Vera Gel above.
- When to adjust up: If you’re on level 5 and you don’t feel it at all. Firstly, you may not be using firm enough pressure. But also, you may not have enough hydration & electrolytes. See the section on Masking with Aloe Vera Gel above.
That said… if this is your first time you’re going to want to spot a test.
By following these steps, you are ensuring safe, comfortable, and effective use of your MicroSculpt device, and paving the way for optimal skincare results.
Why Spot Test? The Importance of Spot Testing Your Microcurrent Device
Most articles on microsculpt will gloss over the importance of spot testing your microsculpt device; however, spot testing is perhaps the most important step in ensuring you have a positive, enjoyable microsculpt experience.
When you spot test MicroSculpt you’re not just Spot testing is a precautionary step where you apply a product or use a device on a small, discreet area of your skin before full application, to make sure a new product causes no adverse reactions. This ensures you have a safe experience when using a new skincare technique. This step helps gauge your skin’s response to your microsculpt device, ensuring a safe and tailored MicroSculpt journey.
How to Conduct a Spot Test Before Beginning Microsculpt
-
1. Selecting the Proper Spot: Start by selecting an area of skin near or below your jaw that seems comfortable to test. Be sure the skin is well hydrating and irritated before beginning
-
2. Cleanse the Area: Ensure the test area is free of impurities or residues.
-
3. Apply Your Activator Serum: Follow the same procedure as a regular session, applying your activator serum to the test area.
-
4. Test the Device: Set the MicroSculpt device to the lowest intensity and glide it over the test area, gliding the device from the bottom of your chin towards the bottom of your ear.
-
5. Observe: Monitor for any signs of discomfort, redness, itching, or burning, and observe the area for at least 24 hours to detect any delayed reactions.
-
6. Increase Intensity: If no adverse reactions occur, this means your skin tolerates your Microsculpt device and serum well at the lowest setting. Given this, you may consider testing higher intensity levels to ensure comfort and tolerance.
Some Tips on What to Look Out For When Conducting Your Spot Test
-
Sensitivity: Be especially cautious with intensity levels if you have sensitive or reactive skin. Gradual adjustments are key to avoiding irritation.
-
Listen to Your Skin: Note how your skin feels during and after the treatment. Mild tingling is normal; however, any discomfort or irritation indicates a need to decrease intensity, apply more activator serum, or use the Aloe Vera masking technique. look for other causes of discomfort.
-
Adjust for Different Areas: It is very normal to adapt the intensity level when treating varying facial areas, as some parts of your face may be more sensitive than others (explained more in the next section).
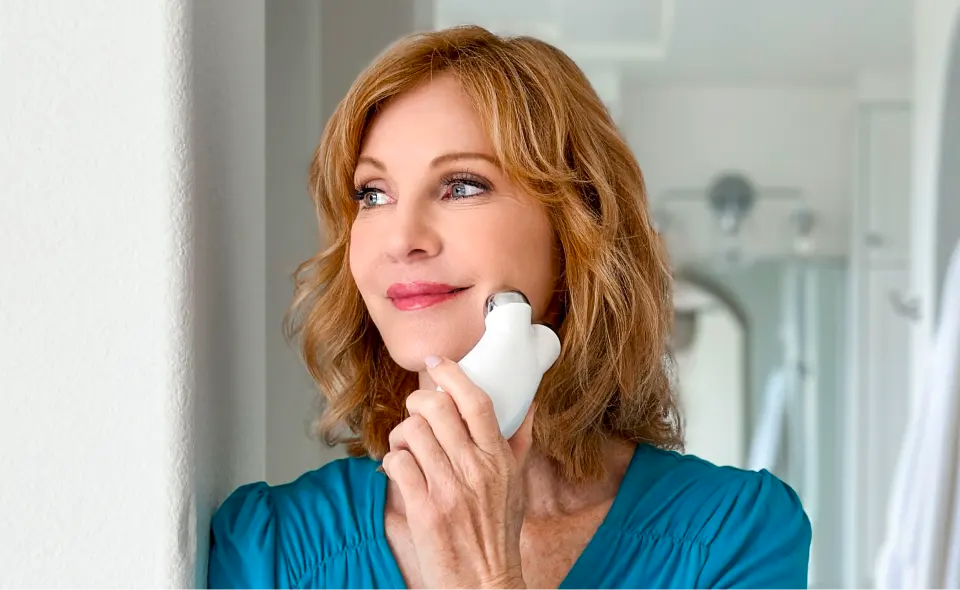
STEP 5: Mastering the Application and Use of Your Microsculpt Device
The key to unlocking the full potential of MicroSculpt is applying it to specific areas of your face to target different concerns and enhance your overall facial contour.
Target These Spots with Your Microsculpt Device To Get Rid Of Wrinkles and Lift your Skin
-
5-20 Minutes Each Session: While you can wrap up a fast session in 5… Focus and consistency is key for getting the best results!
-
Start with your forehead: Begin by targeting horizontal lines and the infamous 11 lines between the eyebrows. Glide the device upwards from the brows to the hairline, giving those eyebrows a little lift!
-
Contouring your cheekbones: Work the device over your cheekbones to enhance contour, moving it upwards from the nasolabial folds to the temples for that rejuvenating lift.
-
Tightening and refining your jawline: Define your jawline by moving the device along the jaw from the tip of your chin to your earlobe, and say goodbye to the appearance of jowls!
-
Firming your chin and jaw: Target a double chin by working under the jawline and use upward strokes on the side of the neck, but steer clear of the thyroid area. Your thyroid is a small butterfly-shaped gland located in your neck, below the Adam's apple. It's crucial for regulating body functions, so avoid using MicroSculpt over it, as the electrical current from the device can interfere with thyroid functioning. If you’re looking to get rid of sagging skin and turkey neck in the area around the thyroid, try MyoGlow!
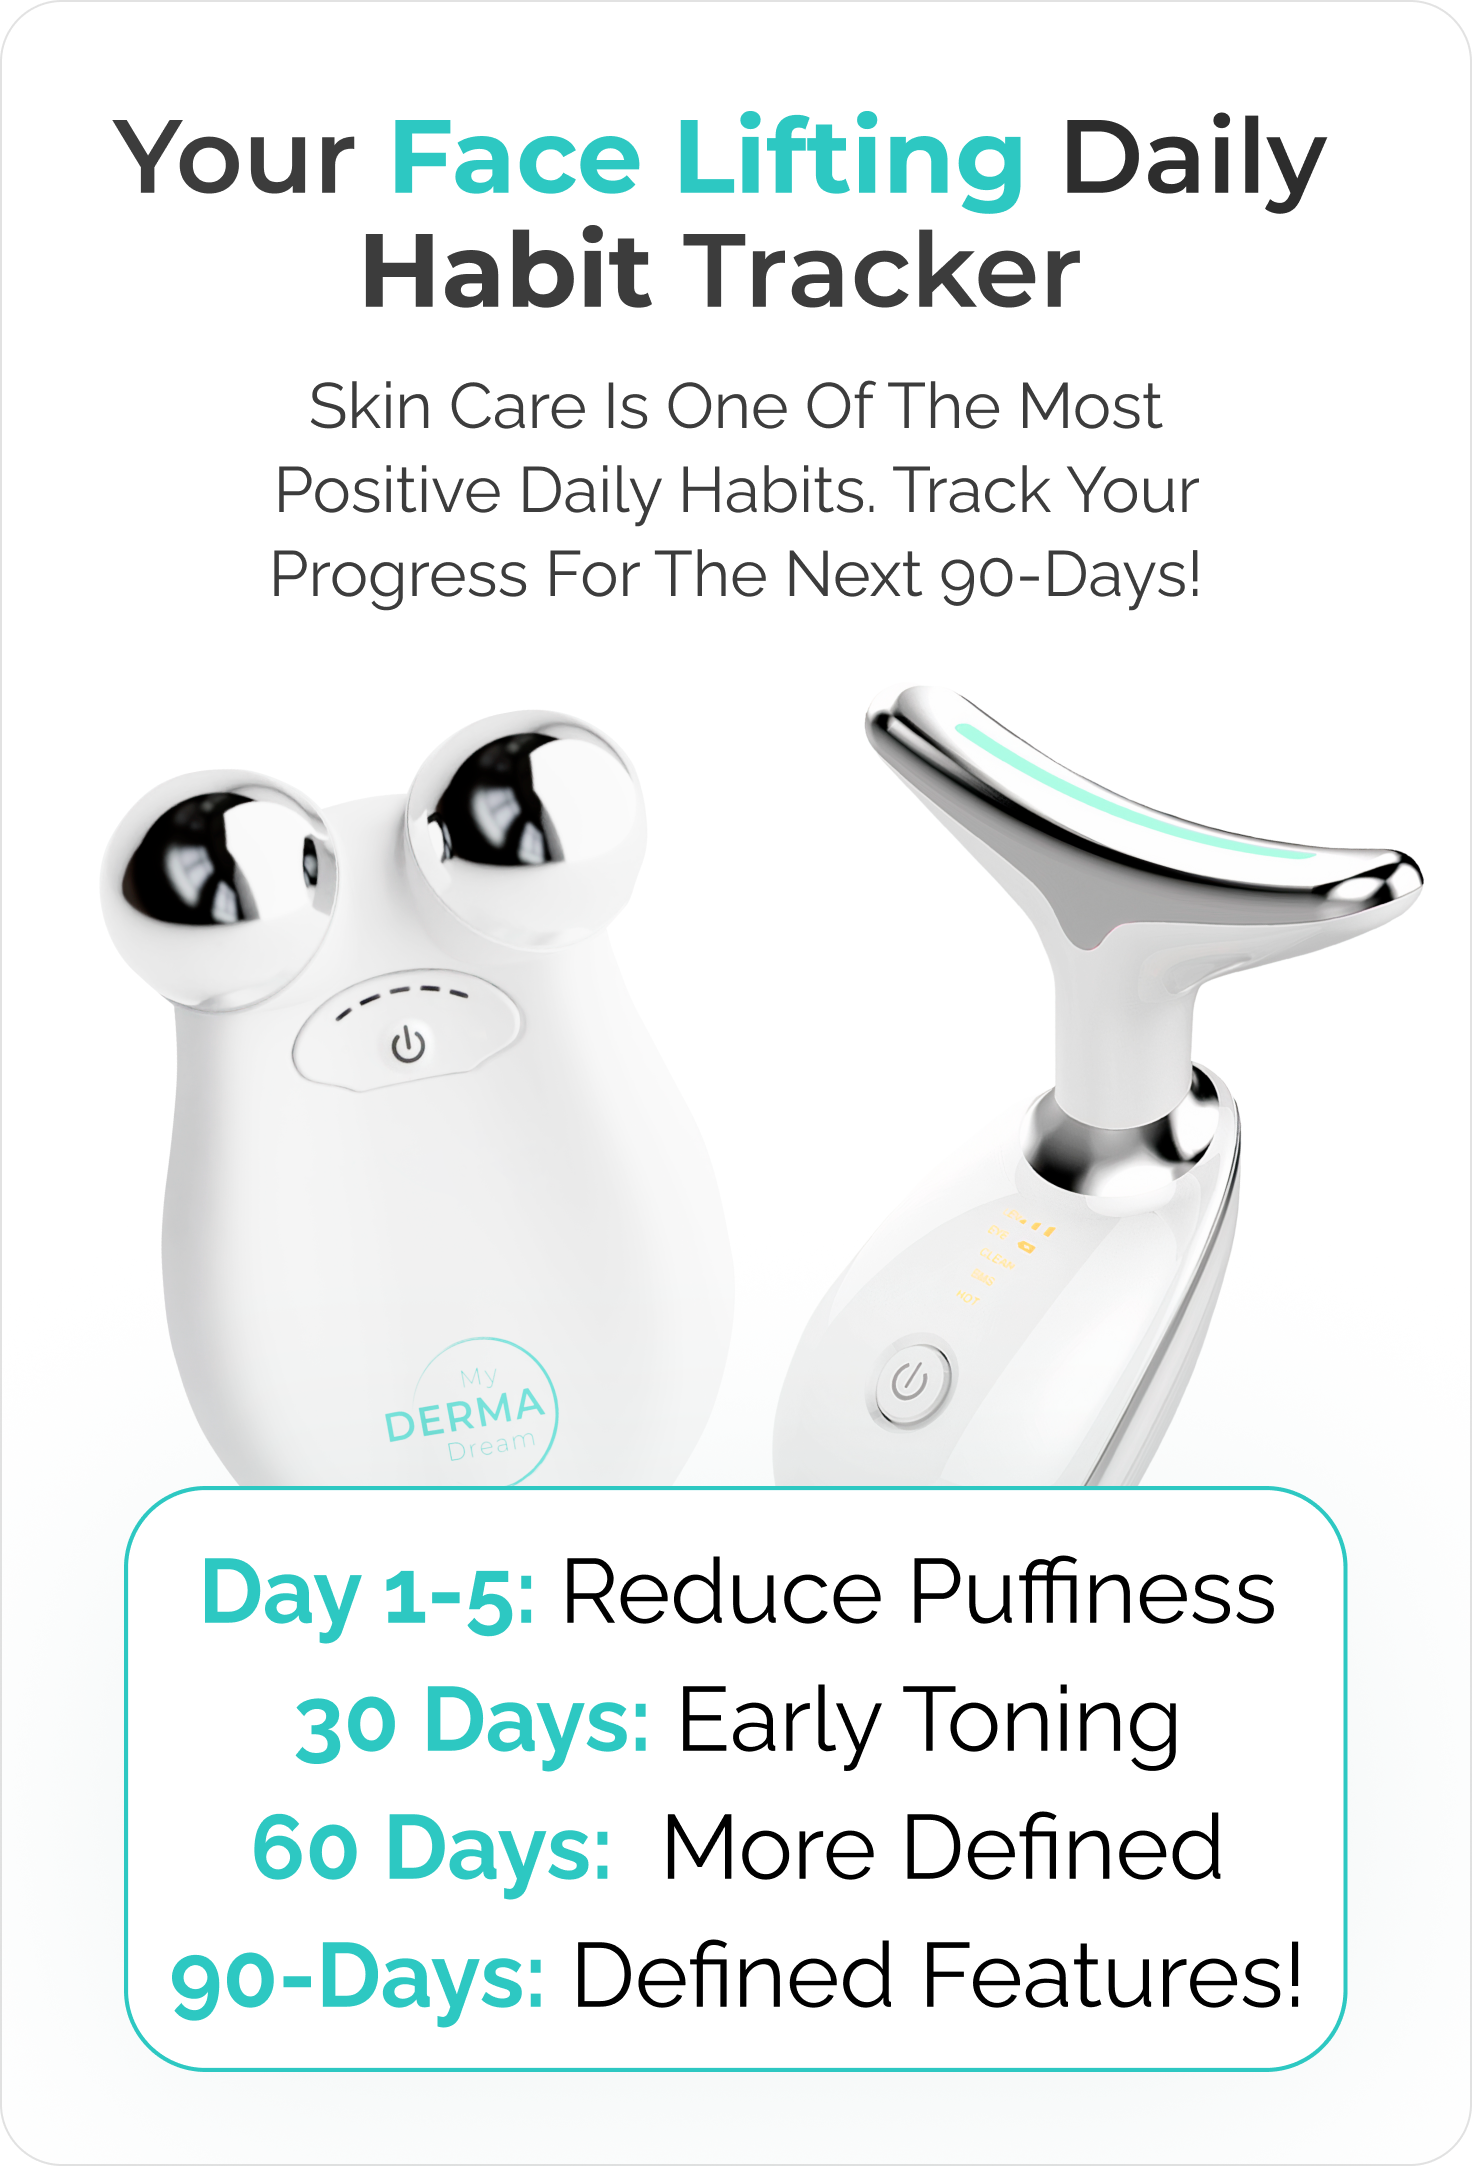
Here’s How Quickly You Could Expect Results:
While everyone's body is different, we’ve noticed the best results come over time. While this isn’t a guarantee of results, if you follow the guide above, here’s an idea of some of the extraordinary results you would expect to see!
- Day 1-5: Reduce Puffiness
- 30 Days: Early Toning
- 60 Days: More Defined
- 90-Days: Defined Features!
Want to make sure you are consistent?
Use the 90-Day Habit Tracker